Mozilla Firefox Installation and Setup Guide
Step 1:
Before we continue with this guide we recommend that you download the newest version of Mozilla Firefox with Google Toolbar. Click on the banner below to download the newest version.
Step 2:
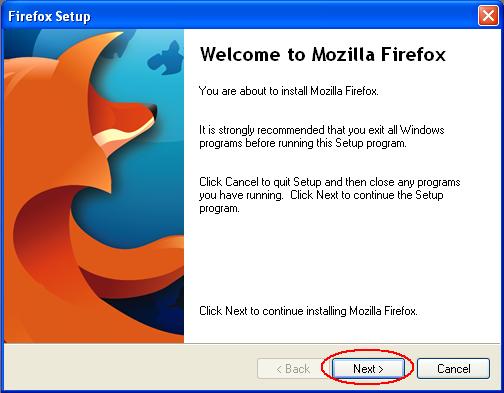
Execute the file FirefoxGoogleToolbarSetup.exe you downloaded, allow the extraction and verification process to complete and wait for the following screen, indicated below, to appear. To proceed click on the Next > button.
Step 3:
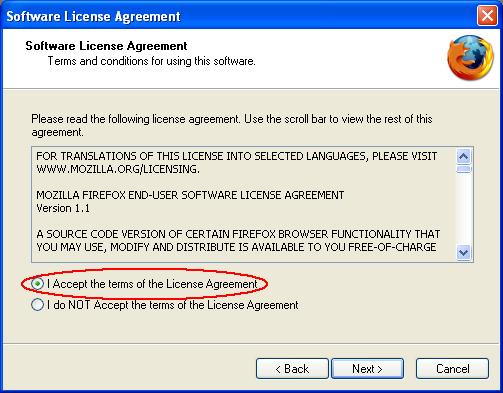
Read the License Agreement and accept it by clicking on the radio button with the text I Accept the terms of the License Agreement next to it. Click Next > to proceed to the next step.
Step 4:
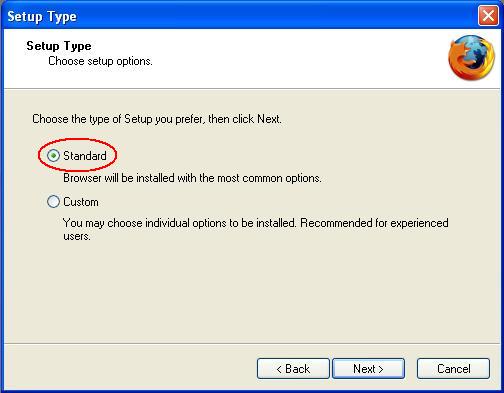
The Standard Setup Option will be selected by default. We recommend you leave it this way and click on Next > to proceed.
Step 5:
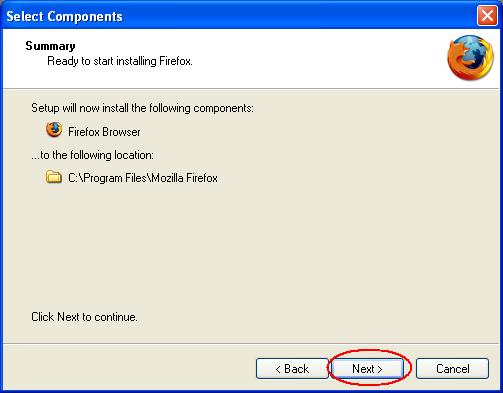
The following screen will appear confirming your options. Click on Next > to initiate the installation process.
Step 6:
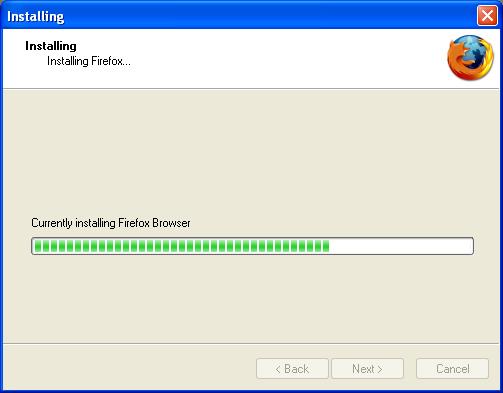
The following screen will appear displaying the progress of the installation. Wait for the process to complete.
Step 7:
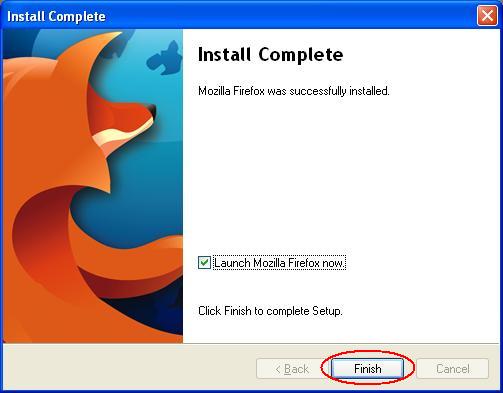
Once the installation is complete, the following screen will appear. Simply click on Finish to launch Firefox in order to import your current browser settings and set up the Google Toolbar.
Step 8:
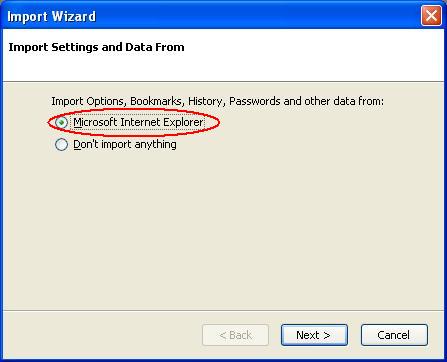
Microsoft Internet Explorer is selected by default. We recommend you leave it this way and click on Next >. This will import your Internet Options, Cookies, Browsing History, Saved Form History, Saved Passwords and Favourites from Internet Explorer.
Step 9:
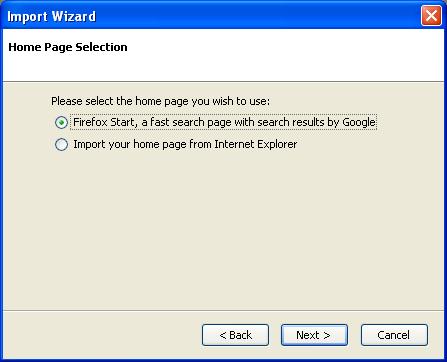
We recommend you keep the default option (Firefox Start, a fast search page with search results by Google) selected in order to make Firefox Start your home page, but you are free to select the second option to import your current home page from Internet Explorer. Make your choice, or if you don't know what a home page is leave the default option selected like recommended and click on Next > to start the importing process.
Step 10:
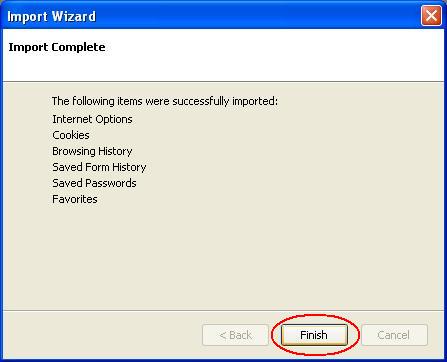
The following screen will appear confirming that your Internet Explorer data has been imported into Mozilla Firefox. Click on Finish or wait for Firefox to start.
Step 11:
To make Mozilla Firefox your default browser, click on Yes once the following box appears. This will ensure that Firefox opens every time you or another application needs to browse the web. When you are using Firefox as a secondary browser during a malware removal process click on No.

Step 12:
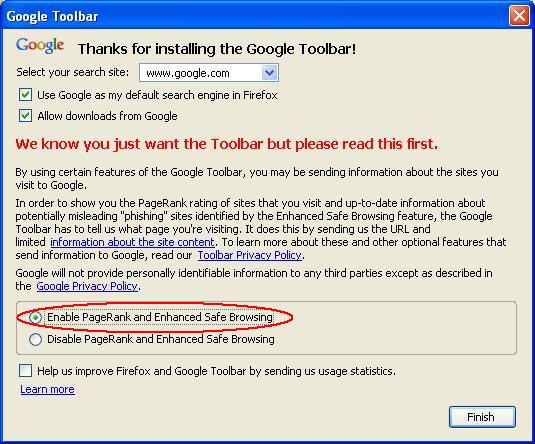
This is the final step in the installation process. It may take a short while before the screen indicated below appears so be patient. To enable Google Safe Browsing and PageRank analysis select the option Enable PageRank and Enhanced Safe Browsing as indicated below and click on Finish. We recommend that you enable this feature so that the Google Toolbar can protect you against phishing scams.
There you have it, easy and effortless. Using Mozilla Firefox will enhance your browsing experience on the web and with its superb security features you can feel safe and sound while visiting your favourite sites. We recommend that Microsoft Internet Explorers read the special section in the Help file - Help For Internet Explorer Users. This will introduce you to some terminology differences between Firefox and Internet Explorer, Firefox's features and keyboard shortcuts so that you won't have any trouble using your new browser. Click on the Help menu and click on For Internet Explorer Users to access this section in the Help file.
Now that you have installed Mozilla Firefox, we recommend you install Mozilla Thunderbird as your e-mail client, if you haven't done so already. You will enjoy adaptive spam filtering, an integrated RSS reader, global inbox support, message grouping and privacy protection with this popular Open Source e-mail client. View the Mozilla Thunderbird installation guide.


